
This article provides sample code to access sensor data for the samsung Gear 2 running tizen. The examples provided with the Tizen wearable SDK are definitely sufficient to get you started , but with a catch – Everything is written in object-oriented FUNCTIONAL (enterprise) javascript (even implementing the MVC pattern for cleaner ,clearer code) . For many of us familiar with straightup procedural javascript, it can take immense effort to get a hang of whats going on. So I have written a simple Gear 2 application in good old procedural javascript (similar performance) which you can import , test and use in your apps. Before you start ensure you are familiar with the structure of Gear 2 apps and running the sample applications .
Code Can be downloaded from Github
First things First! – Create a New Project.
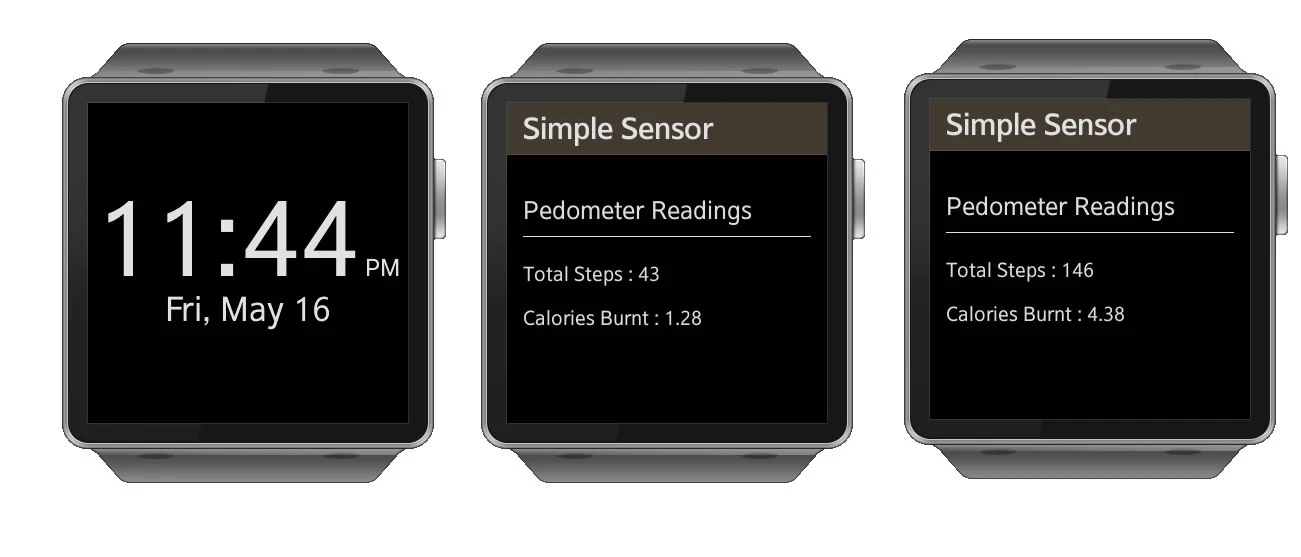
In the Tizen wearable SDK do the following
New > Tizen Weaarable Web Project > Template > Wearable UI > List Application
Enter the name of your project – “SimpleSensor” and click finish.
See also : How to sideload .wgt files on your gear device or emulator.
Modify Your index.html File.
Modify your index.html file .. add 3 paragraph tags to hold a title and pedometer information on calories / number of steps taken.
<!-- Sample Code by Victor Dibia, Dencycom.com May 16, 2014 -->
<!DOCTYPE html>
<html>
<head>
	<meta name="viewport" content="width=device-width,user-scalable=no"/>
	<title>Wearable UI</title>
	<link rel="stylesheet"  href="lib/tau/themes/default/tau.min.css">
	<!-- load theme file for your application -->
	<link rel="stylesheet"  href="css/style.css">
</head>
<body>
	<div class="ui-page ui-page-active" id="main">
		<header class="ui-header">
			<h2 class="ui-title">Simple Sensor</h2>
		</header>
		<div class="ui-content content-padding">
			<p style="font-size: 25px ; border-bottom: 1px solid #fff; padding-bottom: 10px; ">Pedometer Readings </p>

			<ul class="ui-listview">
			    <p id="calories" style="font-size: 20px "> Calories</p>
				<p id="steps" style="font-size: 20px ">Steps</p>
			</ul>
		</div>
	</div>
</body>
<script type="text/javascript" src="lib/tau/js/tau.min.js"></script>
<!-- load javascript file for your application -->
<script src="js/app.js"></script>
<script src="js/pedo.js"></script>
<script src="js/lowBatteryCheck.js"></script>
</html>
Notice that we have included a javascript file “pedo.js” at the bottom of the html file which contains the javascript code that gets the sensor information.
Add Javascript Code to Access the Pedometer Sensor and Listen for Changes.
You access the sensor using the “window.webapis.motion object.”
//<!-- Sample Code by Victor Dibia, Dencycom.com May 16, 2014 -->
(function() {
	//alert('pedo here');

	var pedometer = null,
    pedometerData = {},
    CONTEXT_TYPE = 'PEDOMETER';

	if (window.webapis && window.webapis.motion !== undefined) {
        pedometer = window.webapis.motion;
        console.log('Pedometer found');
        start();
    }else {
    	console.log('Pedometer not found');
    }

	 //Start pedomenter ;
	 function getPedometerData(pedometerInfo) {
         var pData = {
             calorie: pedometerInfo.cumulativeCalorie,
             distance: pedometerInfo.cumulativeDistance,
             runDownStep: pedometerInfo.cumulativeRunDownStepCount,
             runStep: pedometerInfo.cumulativeRunStepCount,
             runUpStep: pedometerInfo.cumulativeRunUpStepCount,
             speed: pedometerInfo.speed,
             stepStatus: pedometerInfo.stepStatus,
             totalStep: pedometerInfo.cumulativeTotalStepCount,
             walkDownStep: pedometerInfo.cumulativeWalkDownStepCount,
             walkStep: pedometerInfo.cumulativeWalkStepCount,
             walkUpStep: pedometerInfo.cumulativeWalkUpStepCount,
             walkingFrequency: pedometerInfo.walkingFrequency
         };

         pedometerData = pData;
         return pData;
     }

     /**
      * Return last received motion data
      * @return {object}
      */
     function getData() {
         return pedometerData;
     }

     /**
      * Reset pedometer data
      */
     function resetData() {
         pedometerData = {
             calorie: 0,
             distance: 0,
             runDownStep: 0,
             runStep: 0,
             runUpStep: 0,
             speed: 0,
             stepStatus: '',
             totalStep: 0,
             walkDownStep: 0,
             walkStep: 0,
             walkUpStep: 0,
             walkingFrequency: 0
         };
     }

     /**
      * @param {PedometerInfo} pedometerInfo
      * @param {string} eventName
      */
     function handlePedometerInfo(pedometerInfo, eventName) {
    	 pedometerData = getPedometerData(pedometerInfo)
    	 console.log('Total Steps : ' + pedometerData.totalStep);

    	 document.getElementById("calories").innerHTML =  'Total Steps : ' + pedometerData.totalStep;
    	 document.getElementById("steps").innerHTML = 'Calories Burnt : ' + pedometerData.calorie;

     }

     /**
      * Registers a change listener
      * @public
      */
     function start() {
         resetData();
         pedometer.start(
             CONTEXT_TYPE,
             function onSuccess(pedometerInfo) {
                 handlePedometerInfo(pedometerInfo, 'pedometer.change');
             }
         );
     }

     /**
      * Unregisters a change listener
      * @public
      */
     function stop() {
         pedometer.stop(CONTEXT_TYPE);
     }

     /**
      * Initializes the module
      */
})();
Add the Necessary privilege.
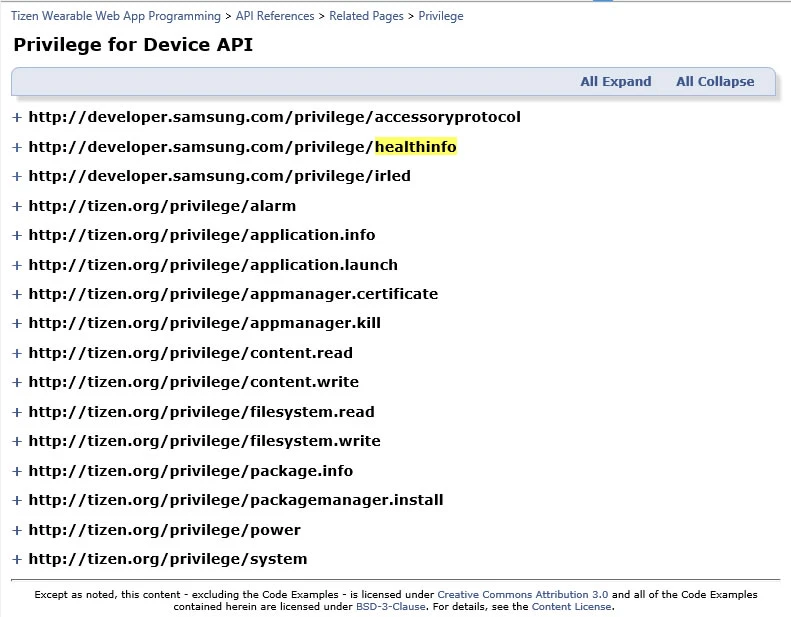
You will need to give permissions to your widget/app to access the hardware sensors. You can specify an API, or API groups, accessed and used by the widget in the Privilege tab of the widget configuration editor. The tab serves as a standardized tool to request the binding of an IRI-identifiable runtime component for a widget to use at runtime.
See Also : How to Access Accelerometer Data in Gear 2 Apps
– In your project Click config.xml
– Under the Privileges Tab, Click Add- http://developer.samsung.com/privilege/healthinfo
This priviledge Allow the application to accessing health data, such as step count abd heart rate measurements from various sensor.
Note: if this privilege is not added, you will get the following error after compiling you project .
SecurityError: The application does not have the privilege to call this method.
After setting the privilege information with the widget configuration editor, you can see the added code in the Source tab.
Test Your Code .
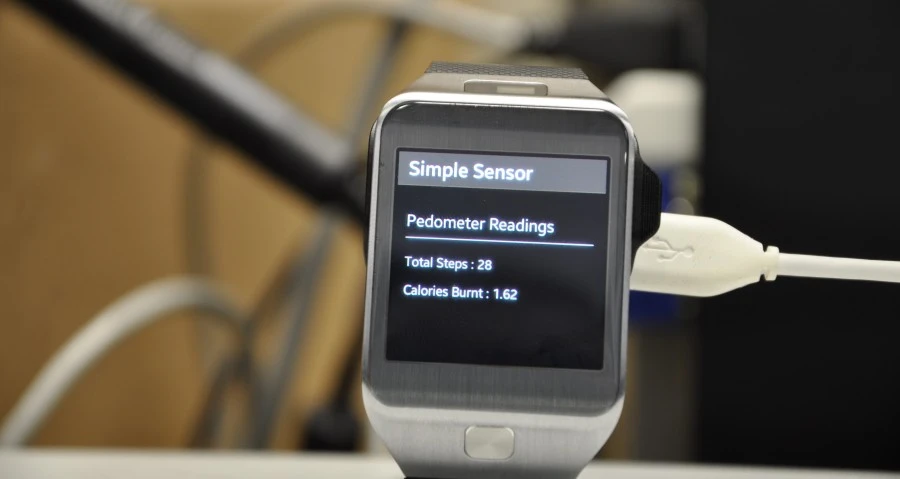
Build your project now and run as Tizen Wearable application. To simulate pedometer data, right click on your emulator > Control Panel > Event Injector > Pedometer > Walk Slowly
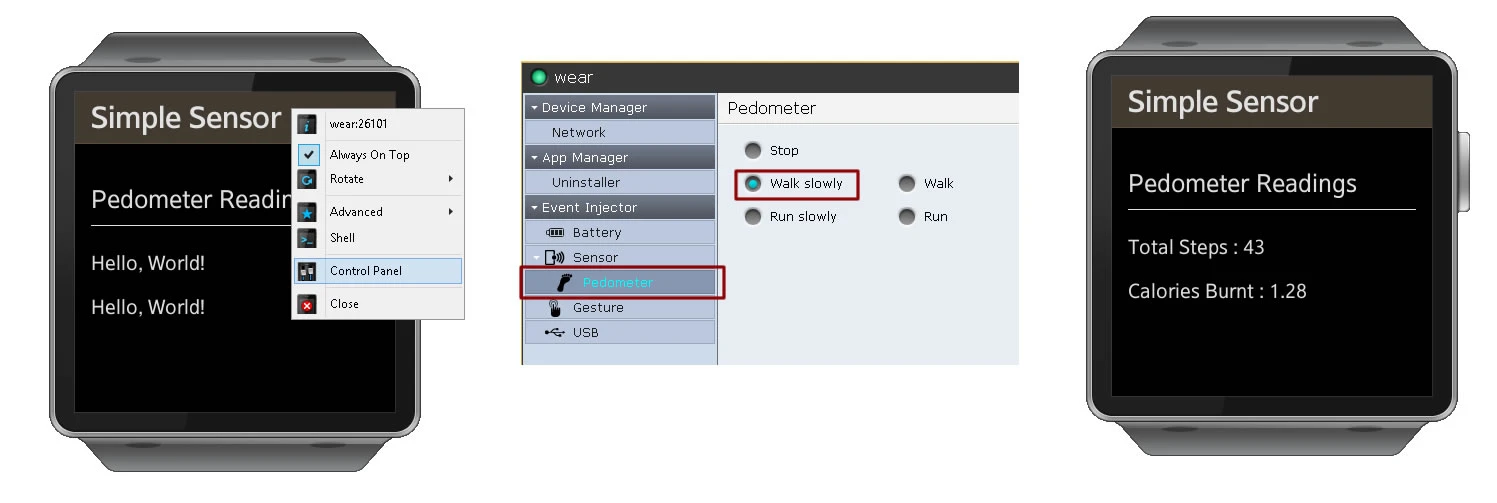
That’s right , we are in business!!
Gimme That Code!
Entire project can be found on github. Feel free to improve it and add sample code for other sensors.
To Access Other Sensors
You can adapt the code above in accessing other sensors or services such as infrared, heartrate monitor etc . You will need to know which prividege necessary for each service/sensor. You can find this information in the API reference within the help section of the tizen wearable IDE.