

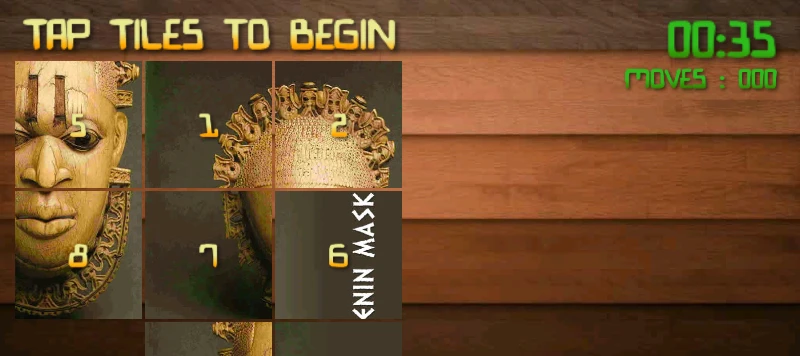
A picture slider puzzle is definitely the next best thing after a number slider puzzle or an alphabet slider puzzle. And that’s what we would be building in this tutorial post.
Note : This post builds on previous tutorials for building a slider puzzle game using cocos2d for android. Its important you review the earlier parts as we build on code and concepts discussed there.
How do we make a picture puzzle.
In our slider puzzle, for each tile, we have a background image (tile.png) which we assign to each tile. How about we make 9 different tile.png images and assign them to each tile such that when arranged, they form a complete picture ? Time consuming (creating 9 different images) an not very scalable (e.g if we need to create a 5 x 5 slider puzzle or if we need to change the image .. etc). A workable but not scalable solution .
What if we could dynamically break a single image into bits and add its bit to each tile ? Turns out we can do that using Cocos2D 2D Textures and that’s how we are going to implement this solution. In our slider puzzle code we already create nodes and assign tile.png sprites as the background of these nodes. Now, instead we dynamically create sprite images as portions of a larger image in our asset folder and assign these portions to a node in a new for loop. We do all of this by improving our “generateTiles” method.
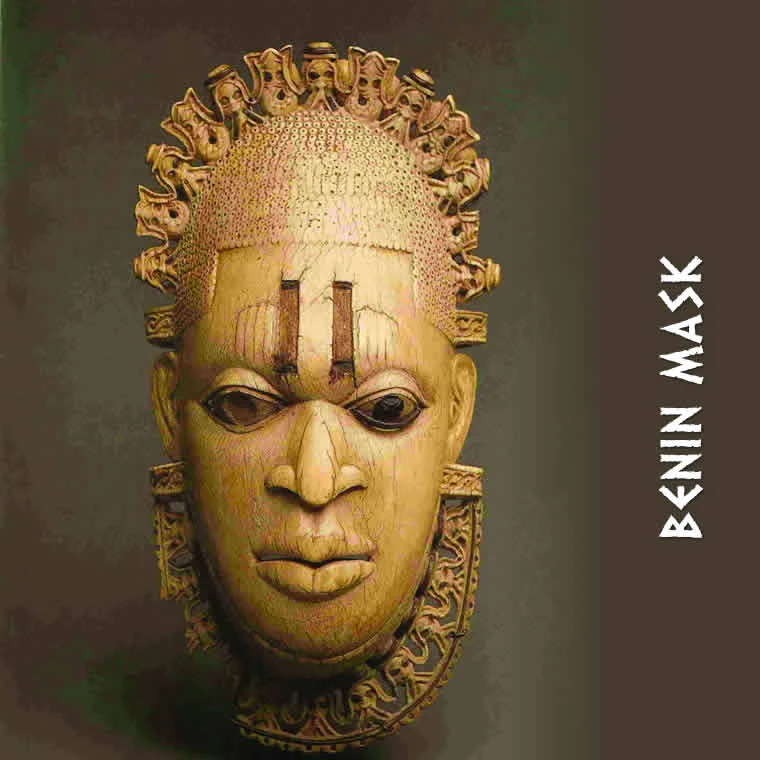
We have a single image above and we assign portions of it as the background image of each tile.
Step 1. Create a bitmap from the image of choice
Bitmap mybit = null;
try {
mybit = getBitmapFromAsset("benin.jpg");
} catch (IOException e1) {
// TODO Auto-generated catch block
e1.printStackTrace();
}
We add the getBitmapFromAsset function to our class
private Bitmap getBitmapFromAsset(String strName) throws IOException
{
AssetManager assetManager = CCDirector.sharedDirector().getActivity().getAssets();

InputStream istr = assetManager.open(strName);
Bitmap bitmap = BitmapFactory.decodeStream(istr);

return bitmap;
}
Note: we have to add benin.jpg to our assets folder. You may replace this image with your own image of choice.
Step 2 Create a 2D texture and initialize it using the created bitmap.
CCTexture2D metexture = new CCTexture2D();
metexture.initWithImage(mybit);
Step 3 Create new sprite from a portion of the texture and assign to tile
Next , create a new sprite from this texture which is a subset of the entire image and assign that to a tile. Essentially we break the picture into smaller bits (spriteframes) and assign them to different tiles. If you have followed the tutorial thus far, you’ll be familiar with basic math used to calculate the size of each tile and the associated for loops (x and y cordinates) used “move” through parts of an image. We draw on that thought process again and use “for loops” to break a given image into bits.
int rowindex = 0 ;
for (float j = 0 ; j < NUM_ROWS ; j++){
for (float i = 0 ; i <NUM_COLUMNS; i++){

//Calculate the size of each tile by dividing the height and width of our image
// and returning the min value of both calculations
float theblock = Math.min( mybit.getHeight()/NUM_ROWS, mybit.getWidth()/NUM_COLUMNS) ;

//Create a new sprite using this dimension above and from a given portion of the image
CCSpriteFrame myframe = CCSpriteFrame.frame(metexture, CGRect.make(i*theblock, j*theblock, theblock, theblock), CGPoint.make(0, 0));
tile = CCSprite.sprite(myframe);
tile.setScale((TILE_SQUARE_SIZE/theblock) * (1.3f*scalefactor));

//Assign our newly created sprite background to a node created earlier.
tileNode.getChildByTag(nodeindex).addChild(tile,-1,1);
tileNode.setContentSize(tile.getContentSize());

if(nodeindex == (NUM_ROWS * NUM_COLUMNS) - 1){
break ;
}
nodeindex++ ;
}
}
Next Steps
– Improve the code such that rather than using static files in the assets folder, users can select images from the device gallery or from camera.
Hint : Use the android gallery intent to launch the gallery widget and get the selected image as a bitmap. Create a function getBitMapFromGallery that returns this selected image.
– Improve the run time of the solution above .
Hint : Combine the two For Loops used . Currently we use two sets of For loops. The first only sets up the empty tiles based on our previous tutorials. The second one generates the new background sprite images from our bitmap and assigns them to the empty tiles. Find a clever way to combine both loops.
– Add a hint button for players to view the complete picture.
– Increase difficulty by removing the numbers on the tiles.
Gimme that Updated Code!
As usual, the updated project on can be downloaded from github. What are your thoughts on the solution we have adopted in developing the picture slider puzzle ? Do you think it can be further improved ? Feel free to share your comments below.
 Step by Step Guide on How to build your first Slider Puzzle game in Cocos2d for Android – Part 1
 Step by Step Guide on How to build your first Slider Puzzle game in Cocos2d for Android – Part 2
 How to Slide a Sprite around based on touch/drag input in Cocos2D for Android
 How to Create a Sliding/Scrolling Menu in Cocos2d for Android